So in Part 1, I did what everyone else is doing. I basically just showed a finished product:
MOC: ROTJ Emperor arrives on Death Star 2 (Part 1) and left it at that.
However what I want to do differently in this blog (and I hope it makes it unique from other LEGO blogs) is to show you how I did it. A moonshot goal would be to help others with LEGO journey and pass on a lot of things I had to learn the hard way through trial and error (because I started with LEGO before the Internet was a thing...)
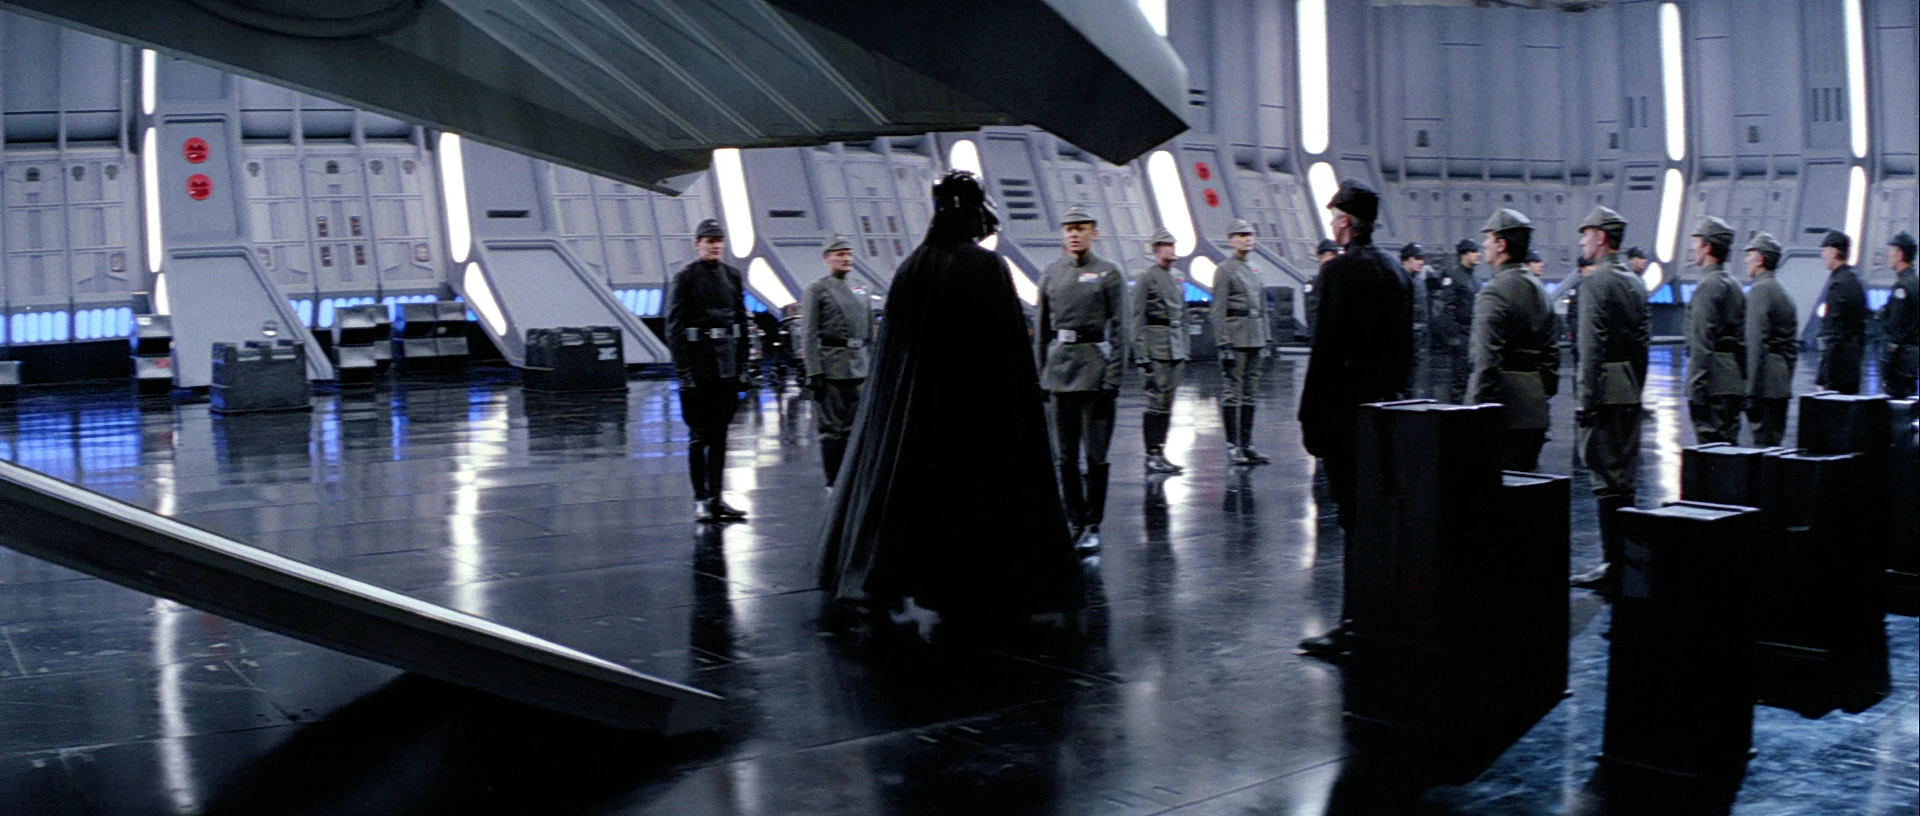
As I said in the original Part 1, I didn't have that much source material, I actually used a different screen to get a better idea of the hangar wall. The scene is Vader arriving to Moff Jerjerrod, to make sure the Death Star 2 is on schedule (prior to Emperor arriving).
You can be the judge, but hopefully my MOC did a good job recreating this.
 |
| (Landscape View) |
As you can see from this small cropped section, the wall has bordered frame/bezel that is slightly raised. There is an angled portion near the bottom and between panels there is jetted out portion.
 |
| (Blown-up Hanger Wall) |
So the first "trick" was to get main wall with frame/brezel right. I didn't want to go with a whole stud width, so I used a
jumper (offset/centered) 1x2 plate for some rows which would indent part of the wall at the bottom. You need to add some plates at the back since I wanted to 1x2 bricks. (FTR - LEGO now has
1x3 version 2 studs, but I only have a very small number of these.) I repeated the technique at the top, which then corrects the offset.
 |
| (Bottom off-set plates.) |
 |
| (Top with 2nd offset so stud pattern is corrected) |
From the back-side you can see the 1x2 bricks protruding. I used a combination of regular and masonry bricks for added texture. I also used some other techniques to add more visual appear.
 |
| (Wall components broken out.) |
 |
| (Wall from the back with 1/2 stud offset) |
Next I had to awkward forward part of the wall. This was floating in-front of the main section and had a angled part near the bottom. It also did not reach all the way to the bottom of the floor.
|
| (Blown-up Hanger Wall) |
With the protruding part, I couldn't use the same technique due to lack of space. I needed something flatter and I wanted to add the white inner parts on the size. So I rotated my working plane and build vertically. I also used flat plate for the offset frame/bezel.
I also flipped inside middle. This gave a very smooth look. Using a combination of Technic and
1x2 with studs on single side, this worked nicely.
Then I used the fairly new hinged
1x2 plates. These are GREAT because they lock into place and can hold a good amount of weight.
(No way I do this normally since they quire rare, but I got bunch once from LEGO store pick-a-brick.)
 |
| (Paired up hinged 1x2 plate.) |
Lastly, to mount this new part, I used
Technic 1x4 brick with 3x holes. Then I used a technique I use
all.the.time and put
Technic 1/2 pin with stud so I can work vertically. I then put round stud for a spacer (I could have used 2 to get even more space) and attached.
 |
| (Technic pin naked and with round stud.) |
 |
| (Back-side of protruding panel.) |
The only other part was for structural purposes. I used more 2x4 bricks at 90° angle to help support the wall since it was so tall. Lined the top of the wall with flat plates to hide all the studs. There are a total of 8 panels in a repeating pattern. There are 7 protruding columns in between the 8 panels that span the total 96 stud width.

Put it together and you got something like this:
 |
| (Portrait View) |
|
(Blown-up Hanger Wall)
|
The bottom was with alternating columns of round trans-clear blue studs. On top of that I basic technique with slopped 1x2 bricks. However to get the offset here on the angle, I used my old friend the
hinged brick, but with a
2x2 top. This allowed me to 2x4 studded plate on a angle to mimic the offset in the wall above. I decorated various panels.
 |
(Hinged Brick for angled offset.)
|
I hope you found that interesting! I tried my best to show what the "guts" look like behind the final build, which often times obscures the techniques used. Also there are definitely multiple ways something can be done and it's nice to see what people come up with.
This was all to avoid what in LEGO Castle building the "
Big Ugly Grey Wall". :) Let's see how you guys can make your stuff way more interesting...


No comments:
Post a Comment